Configuring PingOne integration with Certificate Manager - SaaS
Certificate Manager - SaaS can be integrated with PingOne to enable SSO for user identities managed by PingOne (and any on-prem Active Directory forests that are synchronized with PingOne using AD Connect) by registering Certificate Manager - SaaS as an Application in your PingOne account.
Tip
Because you'll be making changes to both PingOne and Certificate Manager - SaaS, open both applications side-by-side to help you complete the configuration more quickly.
To set up this integration, you'll do the following:
Step 1: To configure PingOne integration with Certificate Manager - SaaS
-
Sign in to both Certificate Manager - SaaS and to your PingOne account.
-
In PingOne, go to Applications > My Applications, and then click Add Application.
-
Select WEB APP as the application type, and then click Next.
-
Type a name for the application, and then click Next.
Best Practice
We recommend that you use Certificate Manager - SaaS as the application name, description and category. If you want, you can also upload an image file for the application.
-
Under Authorization Settings, do the following:
-
Leave Grants configured with the default authorization code.
-
Under Credentials, click Add Secret.
-
Copy the generated Client ID and Client Secret, and then in Certificate Manager - SaaS, click Settings > Single Sign On, and paste the Client ID and Client Secret into the associated fields.
-
-
(Optional) If you need to support multiple domains, such as mydomain2.com, mydomain3.com, do the following:
- Add the additional domains to your IdP.
- (Required) Contact Venafi Support to provide them with your additional domains. This is a security measure that allows Venafi to verify the authenticity of the domains before allowing them. This is a one-time requirement when adding any additional domains.
-
In PingOne, click Next to go to the SSO Flow and Authentication settings page.
-
Sign in to Certificate Manager - SaaS.
-
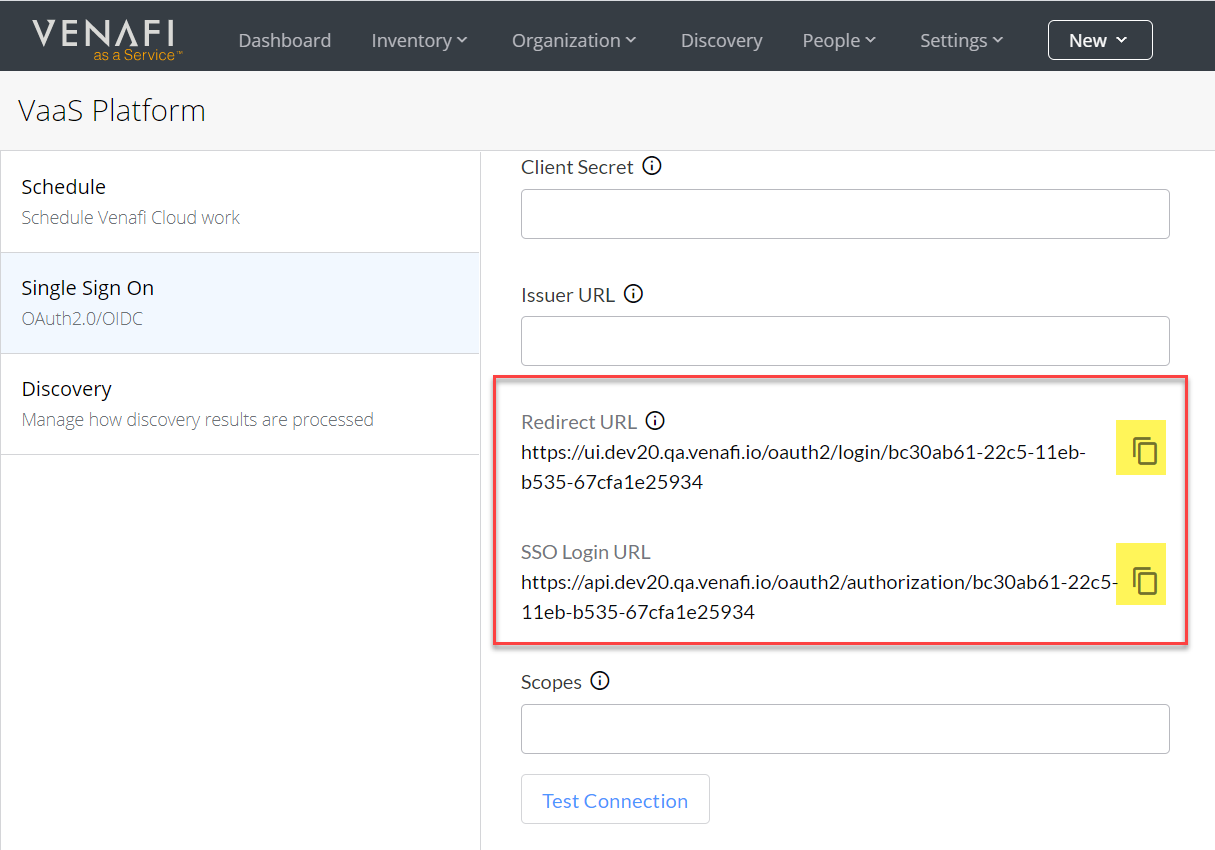
Click Settings > Single Sign-On.
-
On the Single Sign-On page, do the following:
- Click
 to copy the SSO Login URL and paste it into PingOne's Start SSO URL field.
 - Click to copy the Redirect URL and paste it into PingOne's Redirect URIs field.
- Click
-
In PingOne, click Next.
-
In the Connect Scopes field, add the OpenID Profile, OpenID Email, and OpenID Connect scopes from the List of scopes to the Connected scopes.
Important
At a minimum, Certificate Manager - SaaS needs the profile, email and open ID scopes to be connected in order for SSO logins to function.
-
In the Attribute Mapping field, select a value for the sub mapping (as required by PingOne), and then click Next.
Best Practice
We recommend that you use the mail attribute.
-
In the Group Access section, select user groups in PingOne that should be allowed to access the Certificate Manager - SaaS service, and then click Done.
-
Test your SSO configuration by clicking Test Connection.
If your configuration was completed correctly, you should see the ID token returned in the response.
-
Click Save.
Your users can now sign in to Certificate Manager - SaaS using SSO through PingOne.
To configure PingOne to include a groups claim
Consider configuring PingOne to include a groups claim, which allows group membership information to be sent to Certificate Manager - SaaS. While group membership information is not currently used by Certificate Manager - SaaS, future releases will add more functionality that will depend upon group claims in useful ways.
All you need to do is update the Certificate Manager - SaaS application you just created in PingOne by adding a new scope and corresponding claim.
-
Sign in to your PingOne console and click Applications > OAuth settings.
-
Click the Scopes tab, click Add Scope, and then add a scope Value and Name.
The scope value is the value that will be included in OAuth requests sent by Certificate Manager - SaaS to PingOne. The name you use for the scope is displayed in the PingOne admin console.
Best Practice
Consider using a simple naming scheme. For example, you could use groups for the scope and Enterprise user groups for the name.
-
In the Enter Claim field, type a name for the claim to be returned in the response that is sent back to Certificate Manager - SaaS, and then click Save.
Consider using the same name for the claim as the scope that was provided above (so for example, the name would be groups.
-
Click the Attribute Mapping tab, locate the claim that was created in the previous step, and then in the Mapping column, choose the user attribute for the user's PingOne account that contains group information, and then click Save.
Tip
In almost all cases this will be the memberOf attribute. You can either select this value, or to display only the group name, you can use the Advanced function and use the GetFirstRelativeDN function to extract only the group name from the memberOf attribute.
-
Go to My Applications > OIDC, find the application you created previously for Certificate Manager - SaaS, and then click the Edit icon.
-
Click Scopes, locate and select the scope that you created in the List of Scopes and add it to Connected Scopes, and then click Save.
-
Sign in to Certificate Manager - SaaS, and then do the following:
-
Click Settings > Single Sign On.
-
In the Scopes field at the bottom of the page, type the scope name you created in PingOne (e.g. groups).
This configures Certificate Manager - SaaS to request that scope from PingOne for all user authentication requests.
-
Click Test Connection and when prompted, type your enterprise credentials into PingOne.
If the configuration was successful, the claims for your account are displayed.
-
Verify that there is a new claim that contains your user groups displayed, and then click Save.
-