Configuring Auth0 SSO integration with Certificate Manager - SaaS
If Auth0 is your SSO solution, this topic shows you how to integrate Auth0 with Certificate Manager - SaaS.
You can integrate Certificate Manager - SaaS with Auth0 to enable single sign-on (SSO) for user identities with which Auth0 can proxy.
Auth0 is a flexible solution you can use to add authentication and authorization services to Certificate Manager - SaaS. Auth0 administrators can configure connections to various identity providers. These can include social connections such as Google, Facebook, Apple, Dropbox, Twitter, and LinkedIn, or enterprise connections such as SAML, OpenID Connect, Ping, Google G Suite, etc. Alternatively, you could even use your own database. There are a number of options for you to choose from.
TIP
Because you'll be making changes in both the Auth0 portal and Certificate Manager - SaaS, you'll complete the configuration faster if you open both user interfaces side-by-side before proceeding.
To set up this integration, you'll need to
- Configure Auth0 and Certificate Manager - SaaS to work together
- Test the connection between Certificate Manager - SaaS and Auth0
- (Conditional) Add an additional rule to Auth0, if needed
Configuring Auth0 and Certificate Manager - SaaS to work together
-
Log in to your Auth0 account and click Applications.
You'll notice that a default application is created for you already.
-
Click Create Application.
-
On the Create application page, type a name for the application (e.g. Certificate Manager - SaaS), click Regular Web Application, and then click Create.
TIP
You can change the name of the application any time.
More about this step
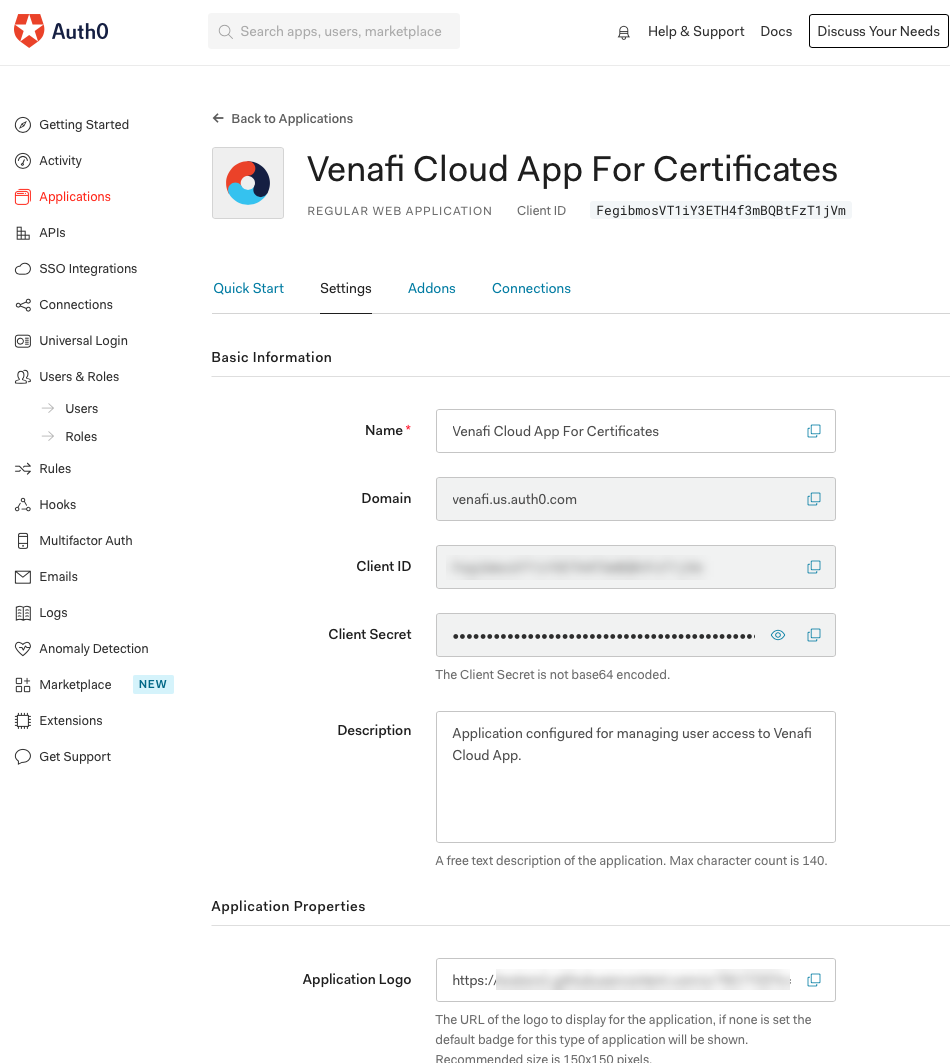
Once the application is created, some information is filled in automatically. For example, notice that in the following image, the domain is your OIDC Issuer URL, the Client ID is the ID that represents your application, and the Client Secret is the secret that is required for configuring the option to sign in.
-
(Optional) If you need to support multiple domains, such as mydomain2.com, mydomain3.com, do the following:
- Add the additional domains to your IdP.
- (Required) Contact Venafi Support to provide them with your additional domains. This is a security measure that allows Venafi to verify the authenticity of the domains before allowing them. This is a one-time requirement when adding any additional domains.
-
From the Settings tab, under Basic information, copy the Domain, Client ID and Client Secret and paste them into a temporary file; these values are required later on when you configure SSO in Certificate Manager - SaaS.
TIP
Note that the redirect URI is sometimes referred to as the callback URI. You can have multiple callback (redirect) URI's.
- Sign in to Certificate Manager - SaaS.
- Click Settings > Single Sign-On.
-
Paste the values you got from a previous step into ClientId, Secret and Issuer URL.
NOTE
The Domain value (which you copied earlier) must be used in order to provide a correct OIDC Issuer URL. Refer to the earlier example screenshot of Domain in the Auth0 Application Settings tab. To ensure that it is properly recognized, the URL should be https://domain from Auth0/. If the issuer URL is configured incorrectly, you'll see an error indicating that the issuer URL does not match.
-
Next to Redirect URL, click
 to copy the redirect URL, and then in Auth0, on the Application Properties page, scroll down and paste the redirect URL into Allowed Callback URLs.
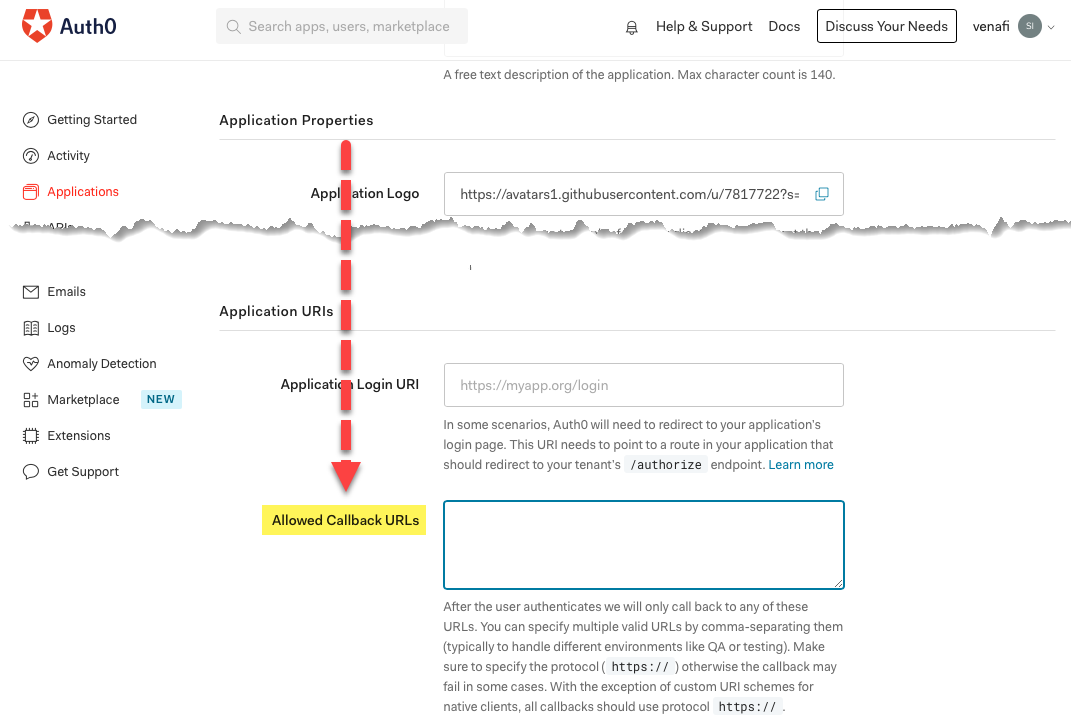
The redirect URL is important because after the login process is complete, Auth0 must know where to send (redirect) users who've successfully logged in.
-
Save your changes in Auth0.
You are now done configuring the Certificate Manager - SaaS application in Auth0.
The next step is to test your connection.
Testing the connection between Certificate Manager - SaaS and Auth0
-
From the Certificate Manager - SaaS SSO Configuration page, click Test connection.
-
When prompted by Auth0, type your enterprise credentials.
When the authentication succeeds, you're redirected back to the Certificate Manager - SaaS SSO Configuration page. From there, you can view the claims that were returned in the OIDC token issued by Auth0.
-
Save your SSO configuration.
(Conditional) Add an additional rule to Auth0, if needed
Certificate Manager - SaaS requires that the standard claims of first name and last name are included as part of the user context in the token. Depending on your configuration of Auth0, you might have to add an additional rule to ensure that the standard claims are part of the user context.
In almost all cases where an enterprise identity provider is used, the first and last names are represented as given_name and family_name within the user token context. However, in scenarios where that does not exist, you'll need add a rule to inject it. If that's the case, do the following:
-
Check the Connections tab of the application config screen in Auth0. If you notice that the selected option is Database then you are relying on Auth0 to manage the user database and Auth0 stores minimal information in it's DB.
-
On the left side, click on Rules, then click "Create Rule" and choose Empty Rule. Name the rule anything you want. For e.g, Add UserInfo To IdToken and overwrite the rule content with the following:
    function addNameToIdToken(user, context, callback) {
    // The standard OIDC claims first and last name are not in the
    // default DB backed user in Auth0. Venafi Cloud needs first and last name.
    // Adding the standard claims, given_name and family_name to idToken.
    // In this case adding nickname and name.
        if (context.clientName === 'VaaS App For Certificates') {
            context.idToken.given_name = user.nickname;
            context.idToken.family_name = user.name;
        }
        return callback(null, user, context);
    }
In the example, you can see that the rule is applied only for the Certificate Manager - SaaS App For Certificates application. If you gave the application a different name, update the rule accordingly.
To verify that your rule is functioning as expected, click Test Connection again (from the Certificate Manager - SaaS SSO Configuration page), which should then show given_name and last_name.
-
After saving your changes to the new rule, do the following to verify that SSO works as expected:
-
In Auth0, select Users & Roles, click Users, and then click Create User.
-
Fill in the required fields, keeping the following points in mind:
-
In Email, the email id must be part of the domain set up for using Certificate Manager - SaaS. In this case it's help.venafi.com.
-
Make sure you've selected the correct connection. In this example, we're using a database called venafi-cloud-user-db.
-
As this user was created using Auth0, an email verification link won't be sent automatically.
-
For testing purposes only, from the Details tab, under EMAIL, click Edit, and then in the Edit E-mail modal, click Set email as verified.
-
-
Go to login.venafi.cloud and type your tenant name.
- A login screen appears.
-
Enter the email address, then click Next.
You will see to the Auth0 login screen.
-